
If you have the Ignite package or higher in Xero, you can use it to raise invoices for your clients. It’s a quick, simple process and will almost certainly save you time - especially if you’re currently creating invoices manually.
Step 1: Make Sure Your Client Is Set Up
Before you create an invoice, check that the client exists in your Contacts list. You can do this by going to the Contacts menu in the blue bar at the top, and if you need to add them, use the green “New Contact” button.
For invoicing, make sure the contact record includes the Primary Person’s name — this appears on the email your client receives - and their email address.
Step 2: Choose How to Create the Invoice
There are two ways to start a new invoice:
- Sales → Invoices → New Invoice,
- Click the plus (+) icon in the blue bar → Invoice.
To create a repeating invoice, you must use Option 1 (above). Whereas, Option 2 is slightly quicker for one‑off invoices. Either way, both methods get you to the same place, which can be seen in the screen below.
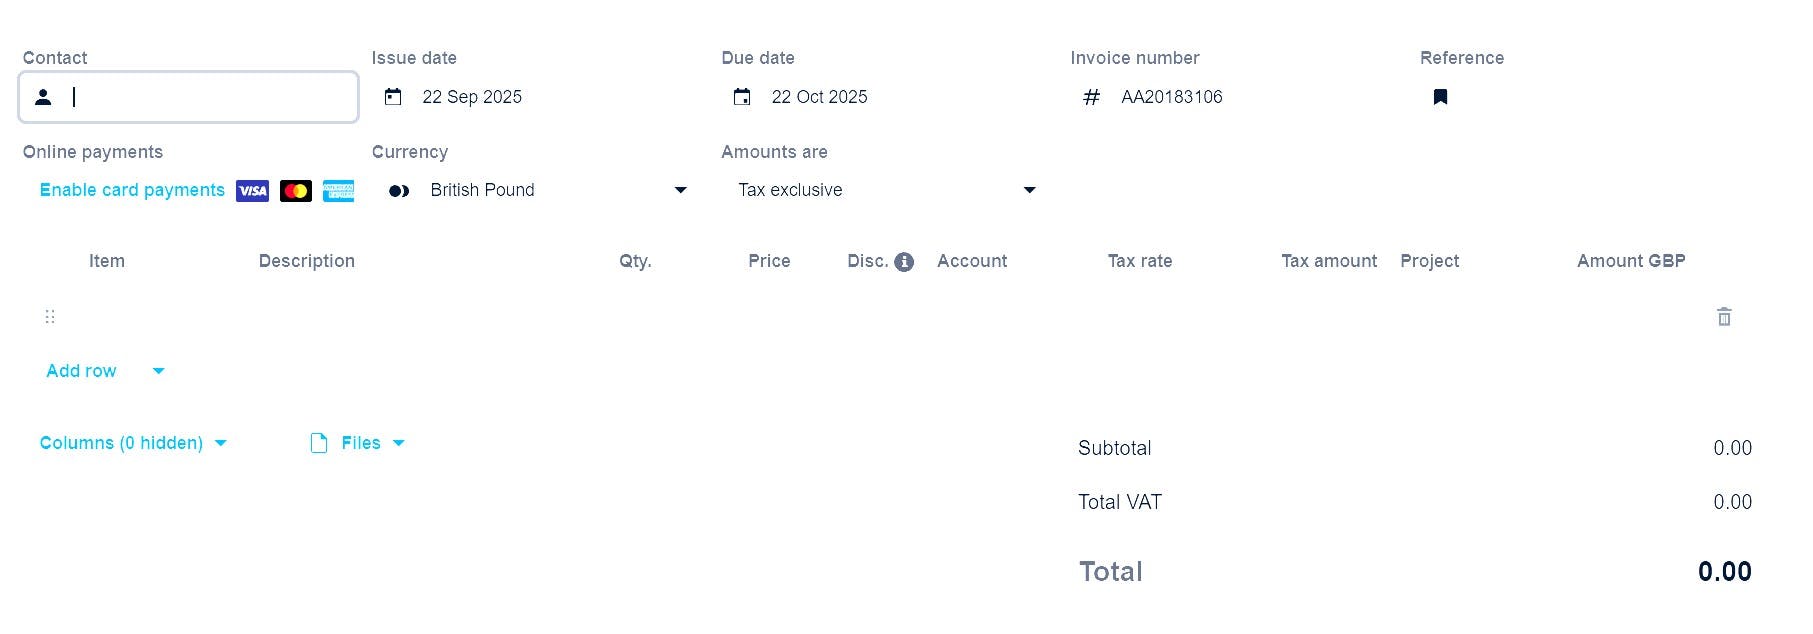
Step 3: Enter the Invoice Details
On the invoice screen, you’ll need to complete the key fields:
- To – start typing and Xero will search your contacts.
- Description – what you’re charging for.
- Quantity & Price.
- Account – usually your main Sales code, unless you’ve set up more detailed income categories.
If you need to break the invoice into multiple lines, click Add row.
Step 4: Use Items for Regular Products or Rates
If you regularly sell the same products or services, or you have a standard hourly rate, you can set up Items.
- Click in the Item box.
- Follow the prompts to create a New Item.
Items can save time and keep invoices consistent by automatically populating Description, Price and the Account Code.
Step 5: Approve and Send
Once the invoice is complete click Approve & Email. Xero will show you the draft email that will be sent to your client. If you’re happy with it, click Send, and your invoice will be emailed immediately and recorded in your accounts.
Additional Step: Set Up Your Invoice Template
Before sending your first invoice, it’s worth checking your invoice template.
To do this:
- Click your organisation name (top left).
- Go to Settings → Invoice Settings.
Here you can customise your Logo, Branding, Payment terms, Layout and Email wording.

